Batch renaming files can be a game-changer when managing large numbers of files, whether for photos, documents, or media collections. macOS provides built-in tools and advanced options to help you rename multiple files quickly and efficiently.
Here’s how you can rename files in bulk, including basic and advanced methods using Finder and Automator.
Batch Renaming Files Using Finder: The Quickest Method
Finder’s built-in batch renaming tool is the simplest option if you need to rename multiple files with basic adjustments.
Steps for Batch Renaming with Finder
- Select Files:
- Open Finder and navigate to the folder containing the files you want to rename.
- Select multiple files by either clicking and dragging to create a selection box, using Shift-Click for a range, or Command-Click to pick specific files.
- Initiate Renaming:
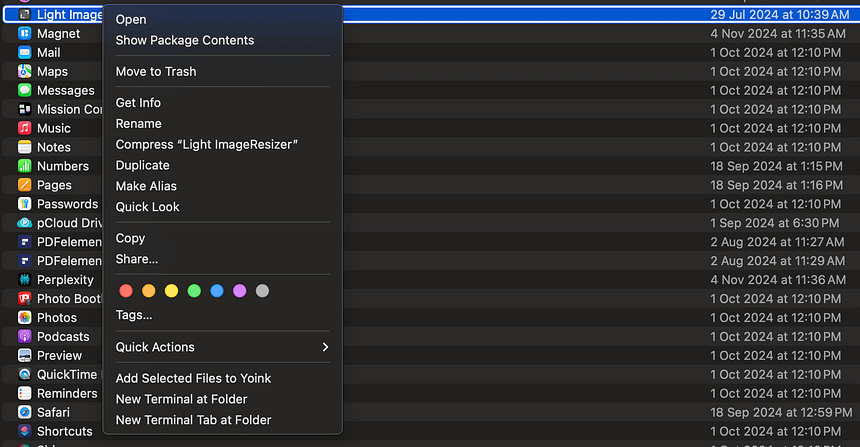
- Right-click on one of the selected files and choose Rename X Items from the context menu, where “X” is the number of files selected.
- Choose Renaming Format:
- Replace Text: Replace a specific word or phrase within filenames.
- Add Text: Add a prefix or suffix to filenames.
- Format: Select sequential numbering or dates for systematic organization. This option allows you to choose a base name and automatically number each file.
- Preview and Rename:
- Preview the changes to ensure they meet your needs.
- Click Rename to apply the changes.
Pros of Using Finder
| Feature | Details |
|---|---|
| Ease of Use | Minimal steps required for renaming |
| Quick Edits | Ideal for simple adjustments like prefixes or suffixes |
| Instant Preview | View changes before applying |
| Undo Option | Can undo the last rename action immediately |
Note: Finder’s batch renaming is effective for quick changes but doesn’t support complex rules or customized formatting.
Advanced Batch Renaming Using Automator
For more detailed renaming tasks, Automator offers a range of advanced options. This built-in macOS app enables you to create customized workflows for file renaming, including setting patterns, adding timestamps, or using multiple renaming rules.

Steps to Set Up an Automator Workflow for Renaming
- Open Automator:
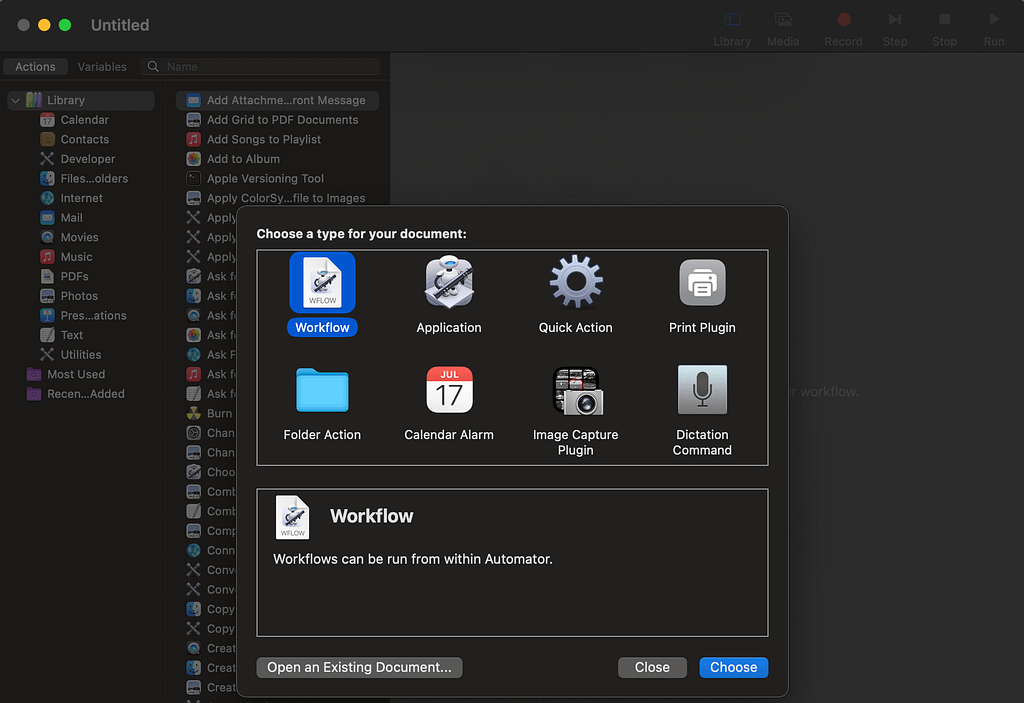
- Launch Automator from Applications and choose New Document.
- Select Workflow to start a new automation process.
- Add Actions:
- In the actions library, search for Get Selected Finder Items and add it to the workflow. This action will pull in the files you select in Finder.
- Next, add the Rename Finder Items action. Automator will prompt you to add a “copy” option. For original file safety, you can keep this setting or proceed directly if you’re confident.
- Configure Renaming Rules:
- Choose your preferred renaming options:
- Make Sequential: Automatically numbers files.
- Add Date/Time: Adds the current date or time for tracking.
- Change Case: Adjusts capitalization (e.g., uppercase, lowercase).
- Add Labels: Useful for categorizing files with specific text tags.
- Save the Workflow:
- Once configured, save the workflow for future use. You can also save it as an Application if you want to run it directly from Finder later.
- Run the Workflow:
- Select the files you want to rename in Finder, then run the workflow. Automator will rename the files based on the rules you configured.
Benefits of Automator for Renaming
| Feature | Details |
|---|---|
| Customizable Rules | Create multi-step renaming rules |
| Time-Saving Workflow | Save workflows for repeated use |
| Advanced Formatting | Add dates, custom labels, and sequential numbers |
| Greater Control | Supports specific changes like file extensions |
Scheduling Automated Renaming Tasks
For users who need routine renaming, Automator workflows can be scheduled to run at set intervals using Calendar or Launch Agents.
Scheduling with Calendar
- Save Workflow as Application:
- First, save your Automator workflow as an Application.
- Create a Calendar Event:
- Open the Calendar app and create a new event at the desired time.
- Set an alert for the event. Under Alert > Custom, choose Open File and select your saved Automator application.
Advanced Scheduling with Launch Agents (for Power Users)
- Create a Launch Agent File:
- In ~/Library/LaunchAgents, create a .plist file specifying the schedule.
- Define parameters for when and how often to run the Automator application.
- Load with Launchctl:
- Use the
launchctlcommand to load and manage the Launch Agent, ensuring it runs as specified.
Note: Scheduling is ideal for regularly managing large sets of files, but initial testing of workflows is crucial to avoid unintended renaming.
Best Practices for Batch Renaming on macOS
To ensure effective renaming without data loss, follow these best practices:
| Tip | Details |
|---|---|
| Preview Before Applying | Always preview changes to avoid mistakes |
| Use Consistent Naming Conventions | Develop a systematic naming convention for easier tracking |
| Keep Backups | For important files, keep backups before renaming |
| Organize Files by Type | Sort files into folders by type or date for easier batch renaming |
| Save Frequently Used Workflows | Reusable workflows save time and reduce errors |
Batch renaming files on macOS is a powerful tool that, when combined with Automator, enables both basic and complex file management. Whether renaming a handful of files or thousands, these methods streamline the process, saving time and reducing manual errors.
With macOS tools like Finder and Automator, batch renaming becomes not just a task but an efficient system for maintaining a well-organized digital workspace.


